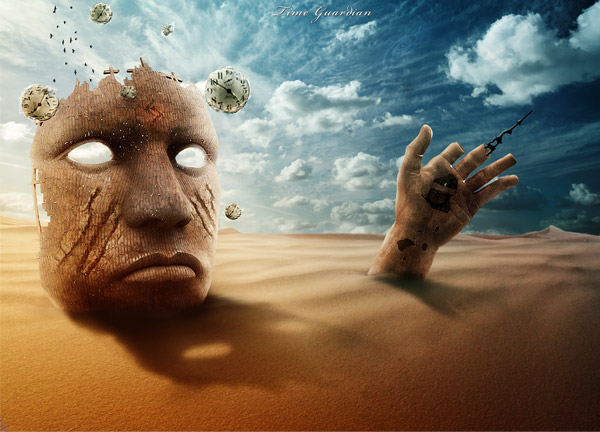
In this tutorial I am going to show you how to create a surreal time-themed photomanipulation using Photoshop. The name of this photomanipulation is "Time Guardian" and it was originally created by Mariusz Karasiewicz (aka FISHBOT1337). I want to take this opportunity to thank him for collaborating with me on this tutorial.
Quick Nav:
Materials Needed:
- Desert 1
- Desert 2
- Iron mask
- Clock
- Bronze Hand
- Gearing Brushes
- Galaxy Brushes
- Bird Brushes
- Sky
- Tree texture
- Celtic Rune Charm Pack
I would like to thank the great photographers and artists for giving me permission to use their images: Rene Asmussen, night-fate-stock, vividlight, jdbartlett, Mind-Illusi0nZ-Stock, Amor-Fati-Stock, ewark, lpdragonfl, Andrew C., Sage-Dreamer, redheadstock.
Before you use any stock images from these photographers, please make sure that you read their stock rules and respect them. They have worked very hard to create all these stock images.
Step 1: Create a new document and add the sky
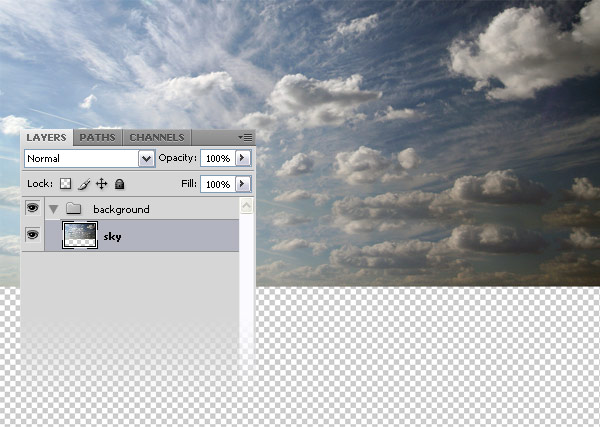
Go to File > New (Ctrl+N) and create a new document in Photoshop. Then download this sky stock image, open it in Photoshop and move it into your first document using the Move Tool (V). Then go to Edit > Free Transform (Ctrl+T), hold down the Shift key and resize this image. Name this layer "sky", hit Ctrl+G to put it inside a group and name the group "background."
Step 2: Add a small galaxy on the sky
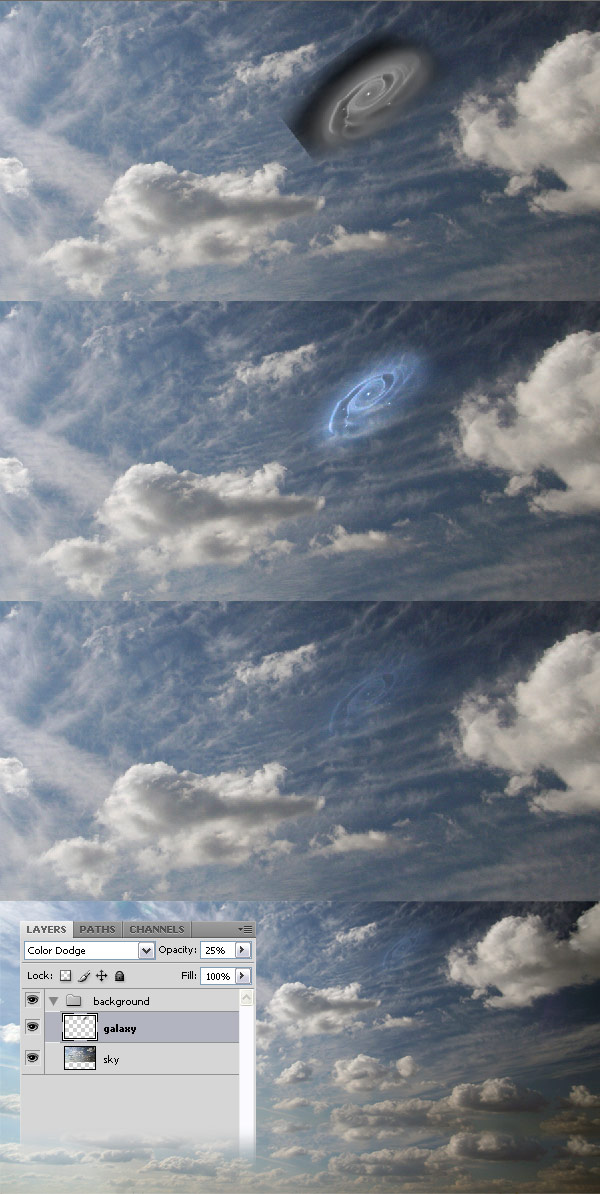
Create a new layer inside the "background" group and name it "galaxy." Then download these brushes and install them. Select the Brush Tool (B), chose one of those galaxy brushes, set the foreground color to #8c8c8c and create a small galaxy on your sky. Then set the blend mode of this layer to Color Dodge 25%.
Step 3: Add the first desert stock photo
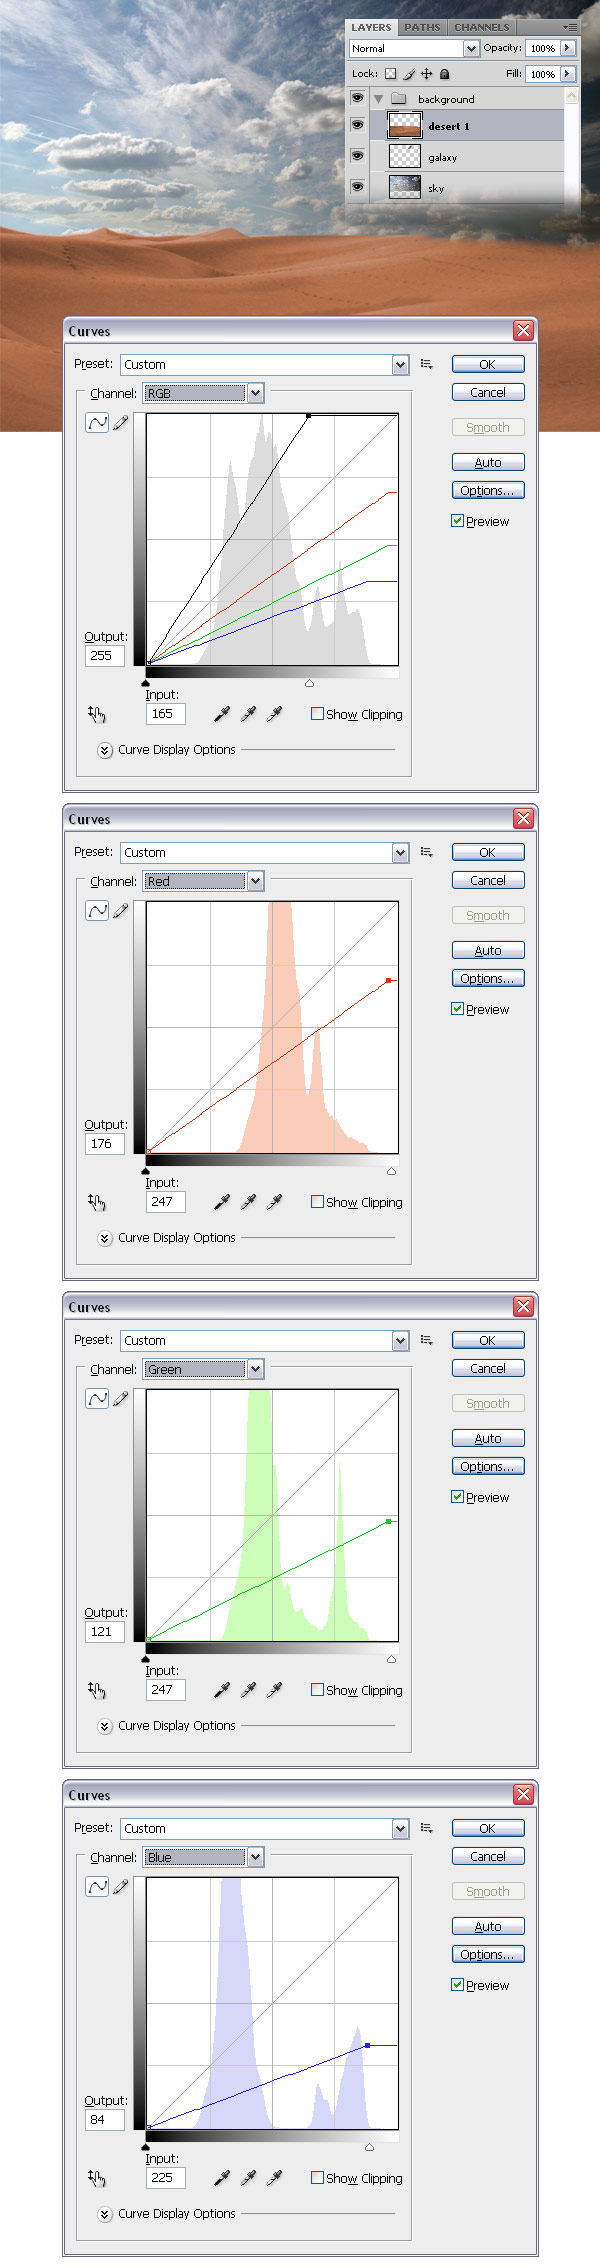
Download this desert stock photo and open it in Photoshop. Double-click on the background layer to unlock it, then use the Magic Wand Tool (W) to select the sky and delete it. Move this image into your first document using the Move Tool (V). Hit Ctrl+M to open the Curves window and use the settings from the following image. Name this layer "desert 1."
Note: You can also use the Eraser Tool (E) and a soft brush to erase some parts of the sky from this photo.
Step 4: Duplicate the "desert 1" layer
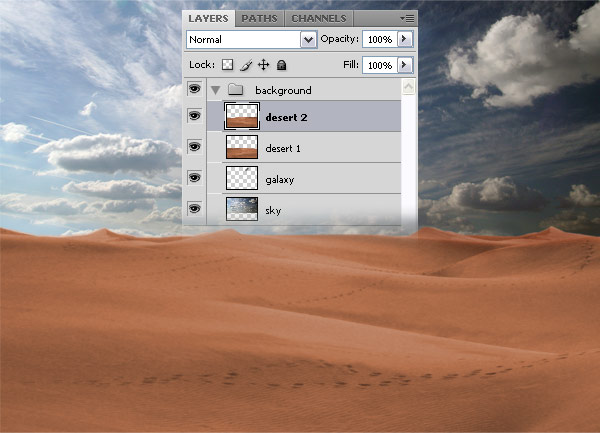
Duplicate the "desert 1" layer (Ctrl+J), and then go to Edit > Transform > Flip Horizontal. Use the Move Tool (V) to move this layer to the right side of your document and name it "desert 2."
Step 5: Add the second desert stock photo
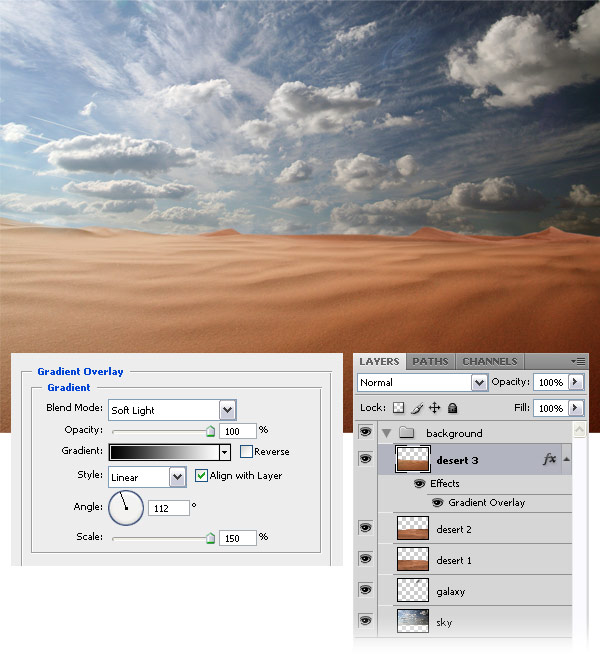
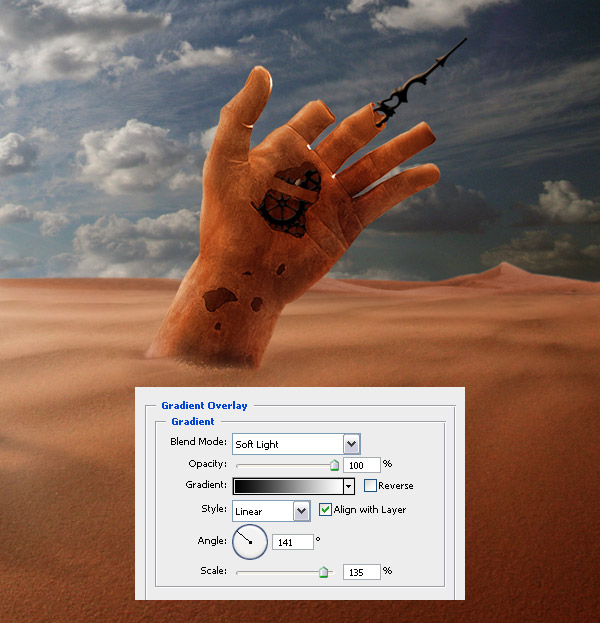
Download this desert stock photo and open it in Photoshop. Double-click on the background layer to unlock it, select the sky using the Magic Wand Tool (W) and delete it. You can also use the Eraser Tool (E) and a soft brush to erase the top area of the desert. Move this image into your document using the Move Tool (V) and go to Edit > Transform > Flip Horizontal. Double-click on this layer to open the Layer Style window and use the settings from the following image for Gradient Overlay. Name this layer "desert 3."
Note: Arrange the image from this step in a way that makes visible the hills of the other two desert photos beneath it.
Step 6: Add the iron mask
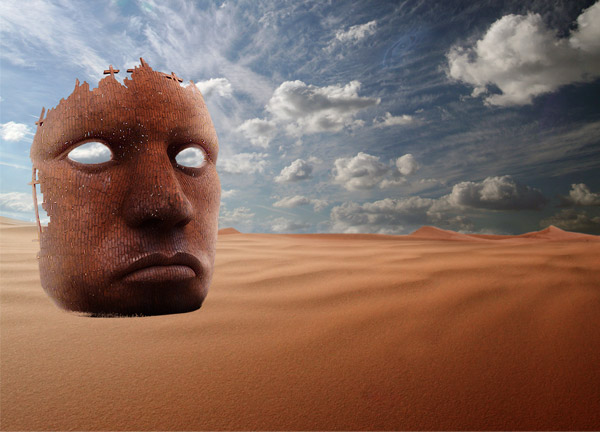
Download this iron mask stock photo and open it in Photoshop. Use the Pen Tool (P) to separate the mask from the background and then use the Move Tool (V) to move it into your first document. Go to Edit > Free Transform (Ctrl+T), hold down the Shift key and resize this layer; right-click on the image, select Flip Horizontal and then hit Enter. Name this layer "iron mask" and put it inside a group (Ctrl+G). Name the group "iron mask" too.
Step 7: Add a Gradient Overlay layer style to the iron mask
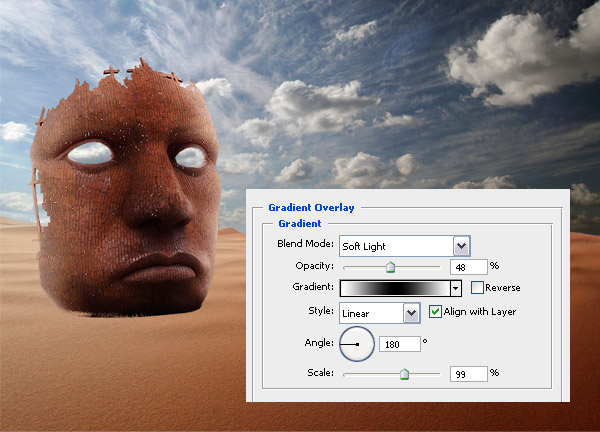
Double-click on the "iron mask" layer to open the Layer Style window and use the settings from the following image for Gradient Overlay.
Step 8: Mask the bottom area of the iron mask

The bottom area of our iron mask should be buried in the sand. To make this happen, make sure that you have the "iron mask" layer selected, and then go to Layer > Layer Mask > Reveal All. Select a black soft brush (B) and paint with it over the bottom area of your iron mask.
Step 9: Add a Levels adjustment layer
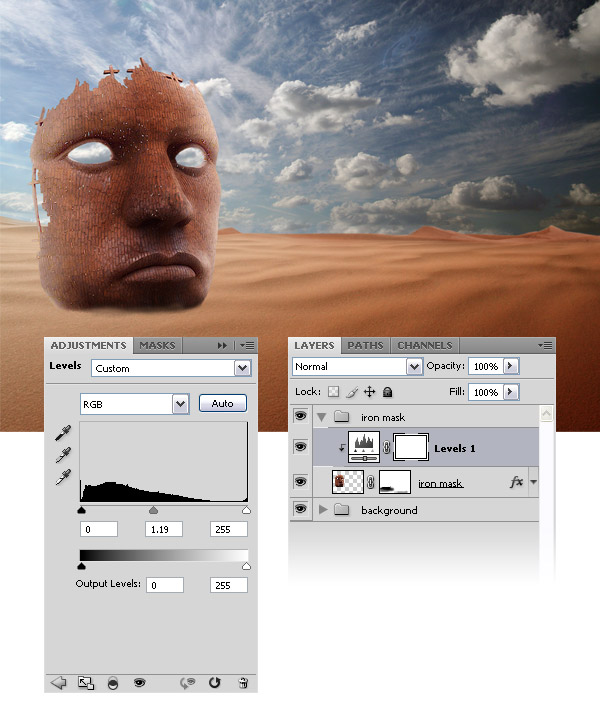
Go to Layer > New Adjustment Layer > Levels, check the "Use Previous Layer to Create Clipping Mask" option and use the settings from the following image to make the iron mask brighter.
Step 10: Create a shadow for the iron mask

Ctrl-click on the thumbnail of the "iron mask" layer to select it, then create a new layer and fill it with black. Put this layer beneath the "iron mask" layer, then go to Edit > Transform > Flip Vertical. Move this shadow at the bottom of the mask. Then go to Edit > Free Transform, hold down the Ctrl key and transform the shadow like I did. Blur this layer (Filter > Blur > Gaussian Blur) and then use the Eraser Tool (E) and a big soft brush with the opacity of 20% to erase some areas of this layer. Keep in mind that the shadow should be darker at the bottom of the iron mask and brighter at the other end. Name this layer "shadow."
Step 11: Add a sign on the iron mask’s forehead
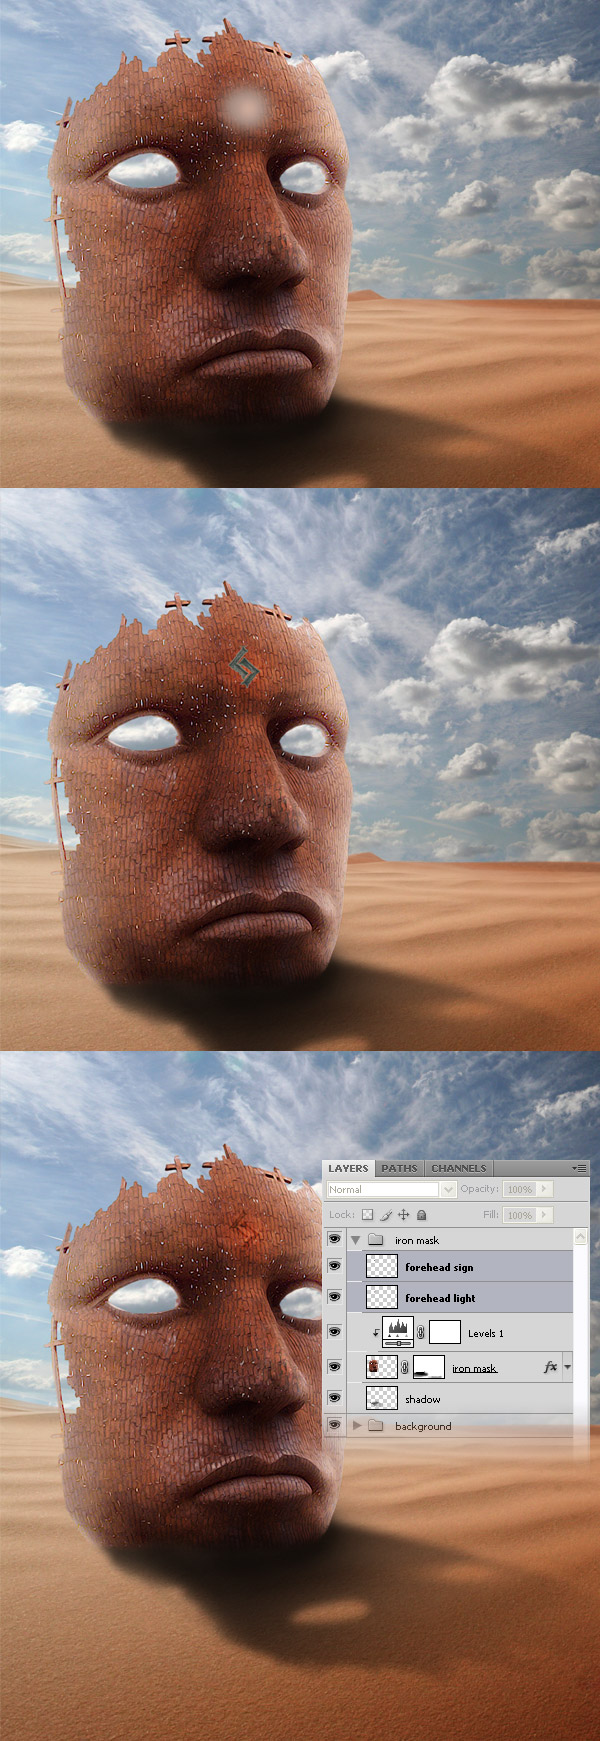
Create a new layer, set the foreground color to #cca899, select a soft brush (B) with the diameter of 100px and click once in the middle of the iron mask’s forehead. Name this layer "forehead light" and set its blend mode to Overlay 75%. Then download the Celtic Rune Charm Pack, open the "Rune-Ger.jpg" image in Photoshop and use the Pen Tool (P) to separate the sign from the background. Move this sign into your first document using the Move Tool (V) and put it above the forehead light. Name this layer "forehead sign" and set its blend mode to Overlay.
Step 12: Add two scars to the iron mask
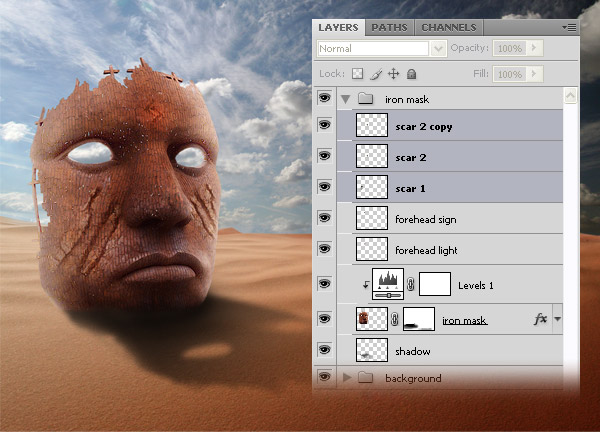
Download this tree texture and open it in Photoshop. Move the image into your first document, use Free Transform (Ctrl+T) to resize the image and put it on the right cheek of your iron mask. Set the blend mode of this layer to Soft Light and use the Eraser Tool (E) and a soft brush to erase the areas of this texture that you don’t need. Then duplicate this layer (Ctrl+J), go to Edit > Transform > Flip Horizontal, use Free Transform (Ctrl+T) to resize this layer and put this scar on the other cheek of your iron mask.
Step 13: Create some lights coming out of the iron mask’s eyes
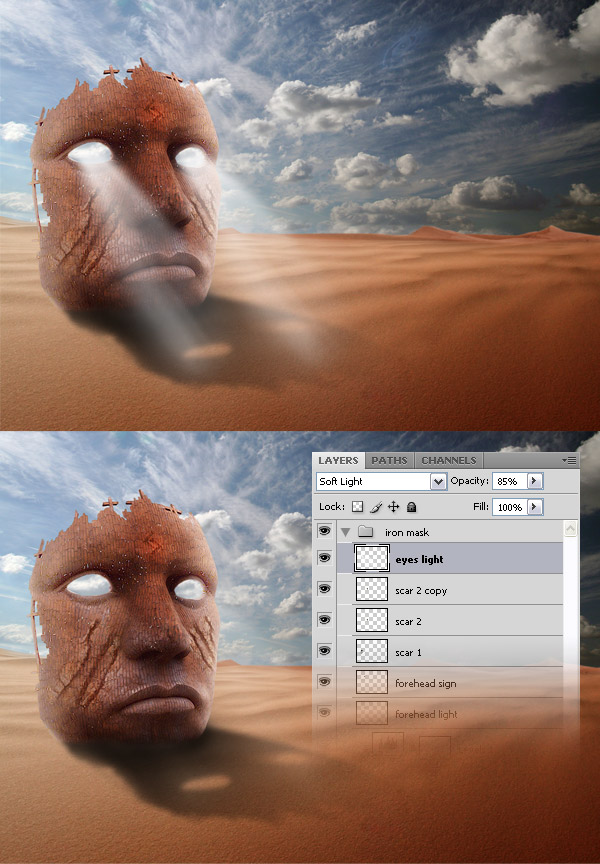
Create a new layer, select a white soft brush (B) and use it to create some lights that are coming out of the iron mask’s eyes. Name this layer "eyes light" and set its blend mode to Soft Light 85%.
Step 14: Add a bronze hand
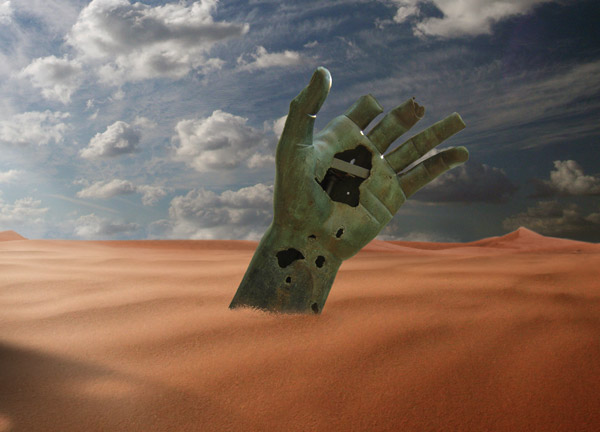
Create a new group and name it "hand." Then download this bronze hand stock image and open it in Photoshop. Use the Magic Wand Tool (W) to separate the hand from the background and use the Move Tool (V) to move the hand into your first document. Go to Edit > Free Transform (Ctrl+T) resize this image and rotate it. Then select the Eraser Tool (E) and erase the bottom area of your hand to make it look like it’s buried in the sand. Name this layer "hand."
Step 15: Make some color adjustments to the hand
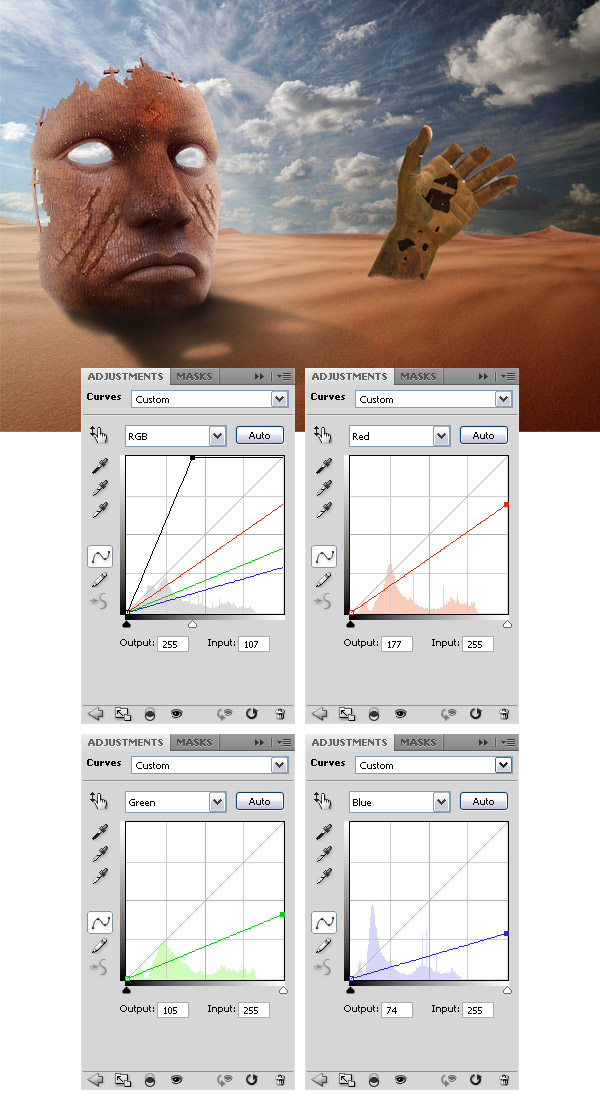
Go to Layer > New Adjustment Layer > Curves, check the "Use Previous Layer to Create Clipping Mask" option and use the settings from the following image. Set the opacity of this layer to 80%.
Step 16
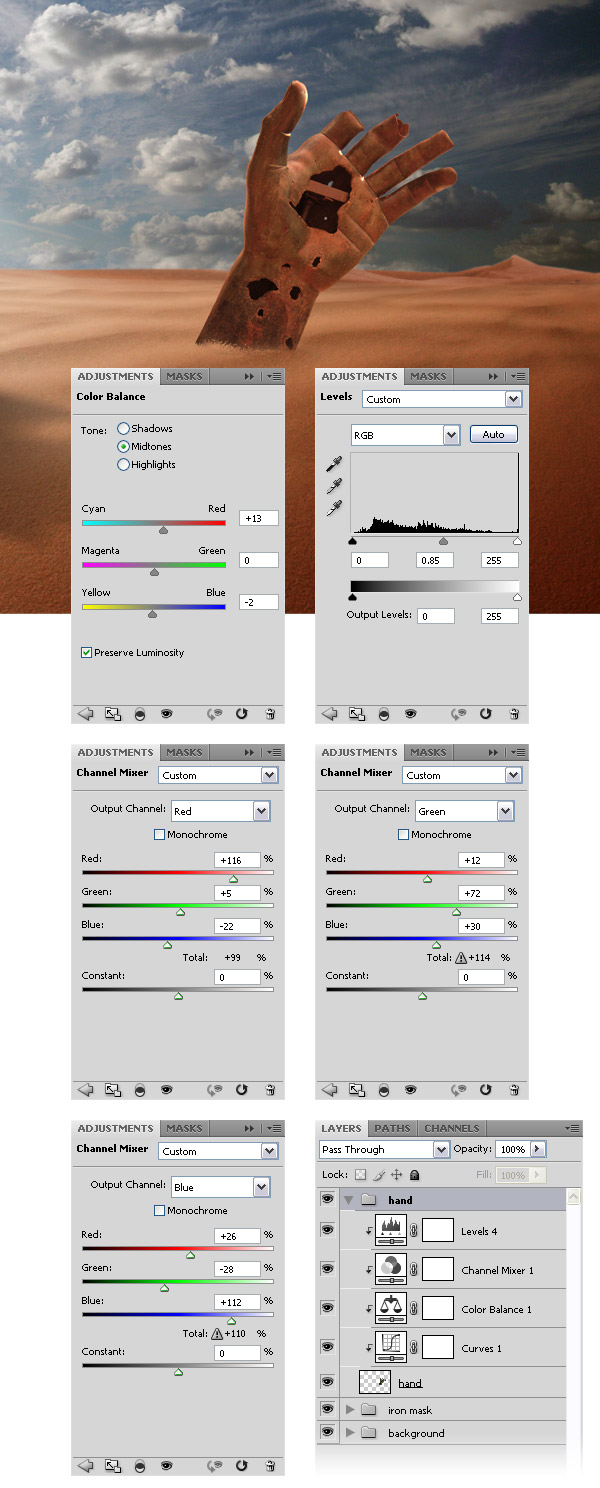
Add three more adjustment layers (Color Balance, Channel Mixer and Levels) using the settings from the following image. You can create all these layers from the "Layer > New Adjustment Layer" menu.
Step 17: Add a texture to the hand
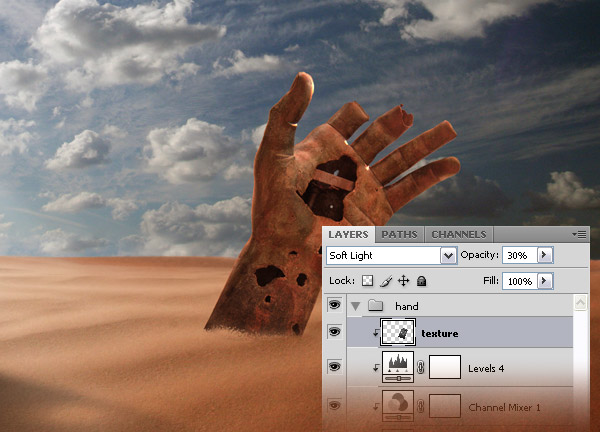
Chose one of these rock textures that you like, or find another one on the internet, open it in Photoshop and move it into your first document using the Move Tool (V). Then use Free Transform (Ctrl+T) to resize this image and rotate it. Make sure that this layer is above all the other adjustment layers, then right-click on it and select Create Clipping Mask. Name this layer "texture" and set its blend mode to Soft Light 30%.
Step 18: Use the iron mask as a texture for the hand
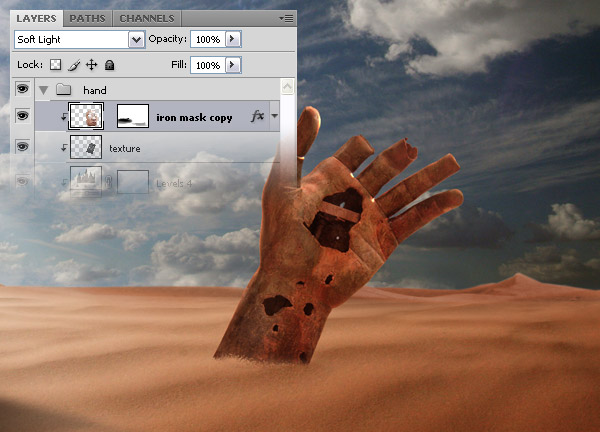
Duplicate the "iron mask" layer from the "iron mask" group (Ctrl+J). Then move this new layer above the hand’s texture layer, right-click on it and select Create Clipping Mask. Set the blend mode of this layer to Soft Light.
Step 19: Create a clock needle
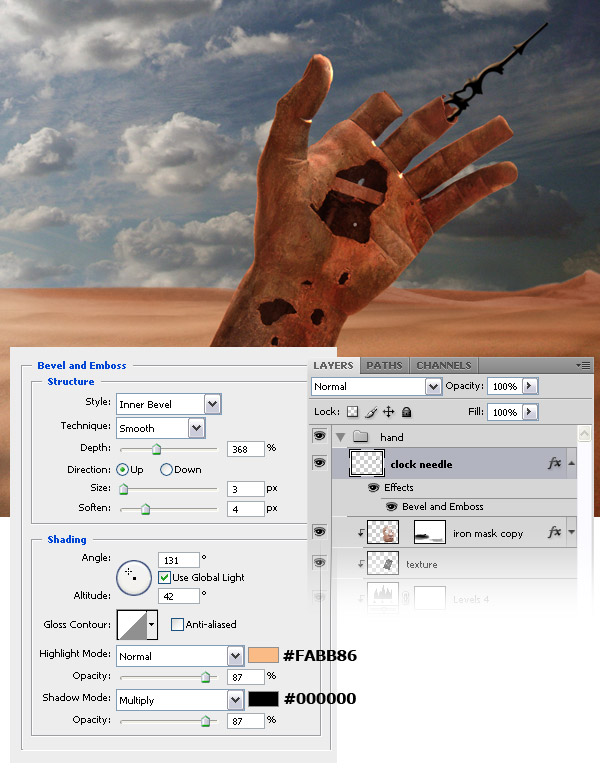
Download these Gearing Brushes and install them. Create a new layer, set the foreground color to black and use one of the brushes which you have downloaded to create a clock needle coming out of one of the hand’s fingers. Double-click on this layer and use the settings from the following image. Name this layer "clock needle."
Step 20: Color the hand in orange
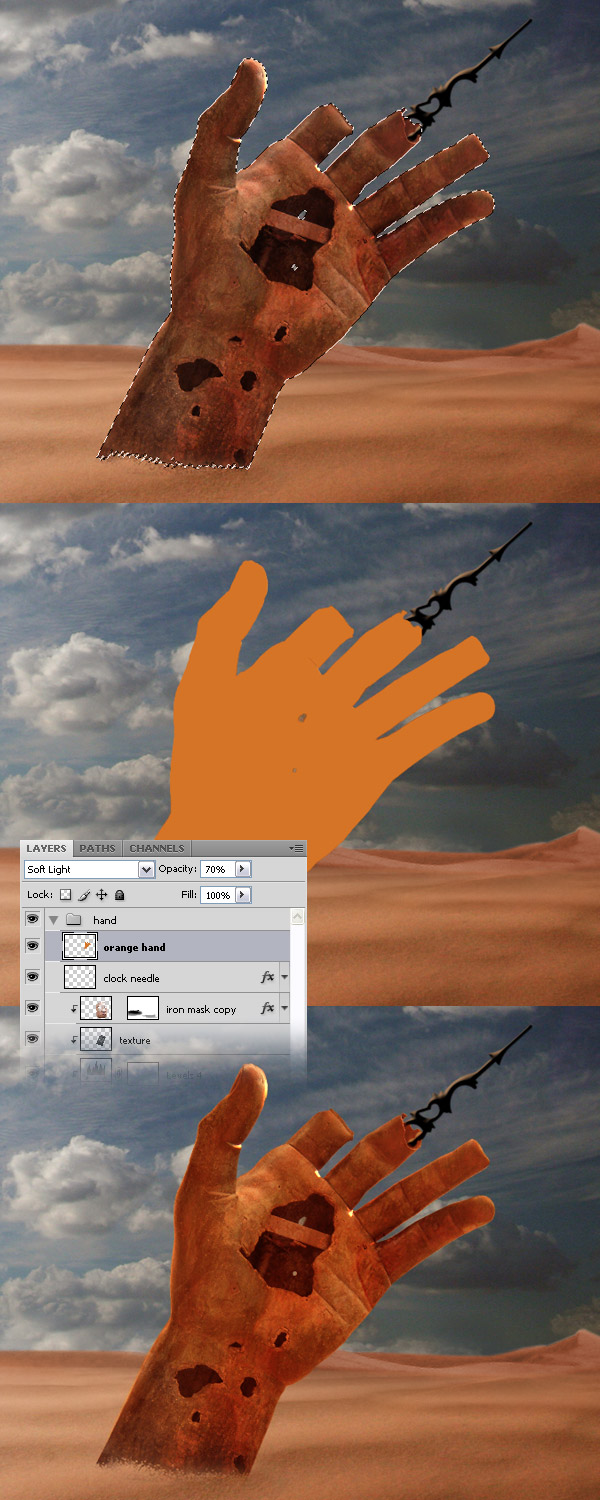
Ctrl-click on the "hand" layer to select it. Then create a new layer and fill it with the color #d57426. Name this layer "orange hand" and set its blend mode to Soft Light 70%. Then use the Eraser Tool (E) and a big soft brush to erase the bottom area of this layer.
Step 21: Create some gears
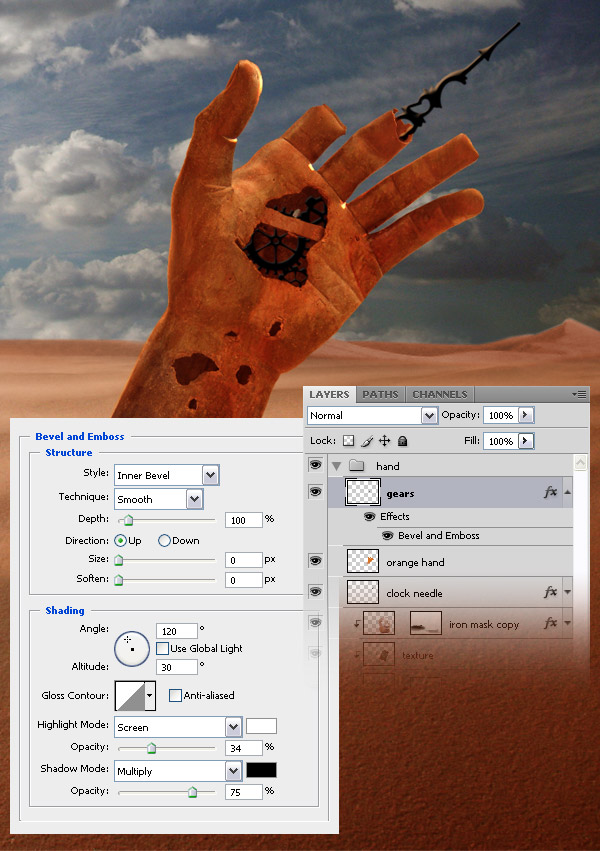
Set the foreground color to black, create a new layer and use the brushes which you have previously download to create some gears inside the hand. Double-click on this layer to open the Layer Style window and use the settings from the following image. Then use the Eraser Tool (E) and a small hard brush to erase the area of the gears that you don’t need.
Step 22: Adjust the lights and the shadows of the iron mask
Double-click on your hand layer to open the Layer Style window and use the settings from the following image for Gradient Overlay. Then use the Burn Tool (O) and the Dodge Tool (O) to create the lights and the shadows. Experiment with the Range and Exposure settings from the option bar to get the effect you want.
Note: when you have the Dodge Tool or the Burn Tool selected you can use the Alt key to quickly shift between them.
Step 23: Create a shadow for your hand
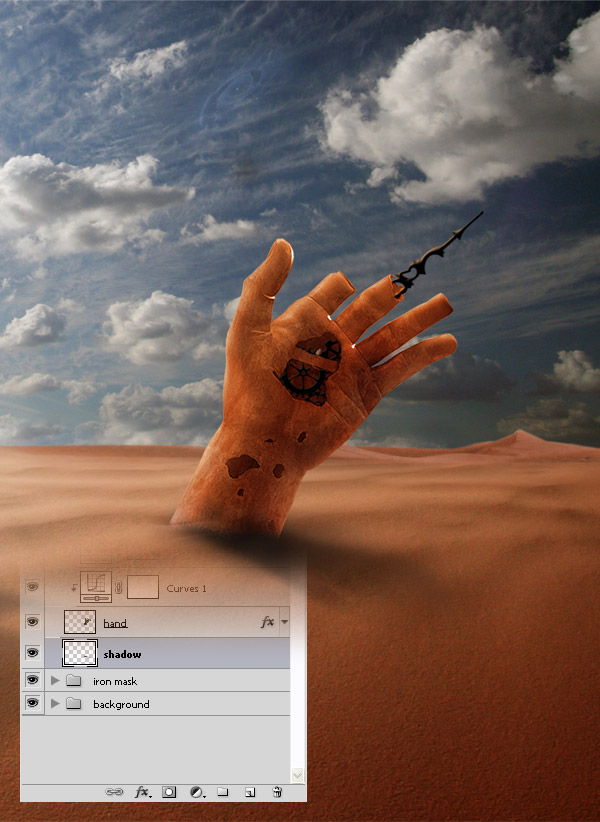
Create a shadow for your hand using the same process which you have used for the iron mask.
Step 24: Add some clocks
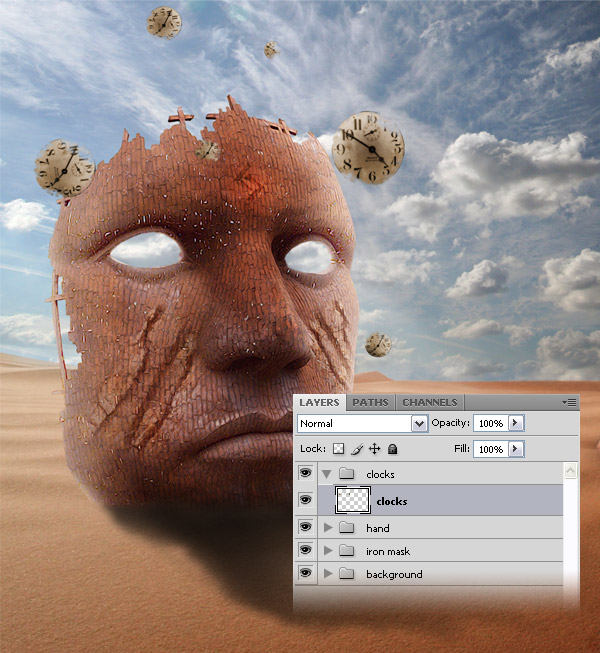
Create a new group and name it "clocks." Then download this image and open it in Photoshop. Use the Pen Tool (P) to separate the clock from the rest of the image. Then move the clock into your first document using the Move Tool (V). Go to Edit > Free Transform (Ctrl+T), hold down the Shift key and resize this image. Then use the Eraser Tool (E) and a grunge brush to erase some areas of this clock.
Repeat this step to add more clocks to your image. Change the size of each clock and rotate them. Take a look at the following image for reference. Select all your clock layers and merge them together (Ctrl+E). Name this layer "clocks."
Step 25: Add a shadow to the clocks
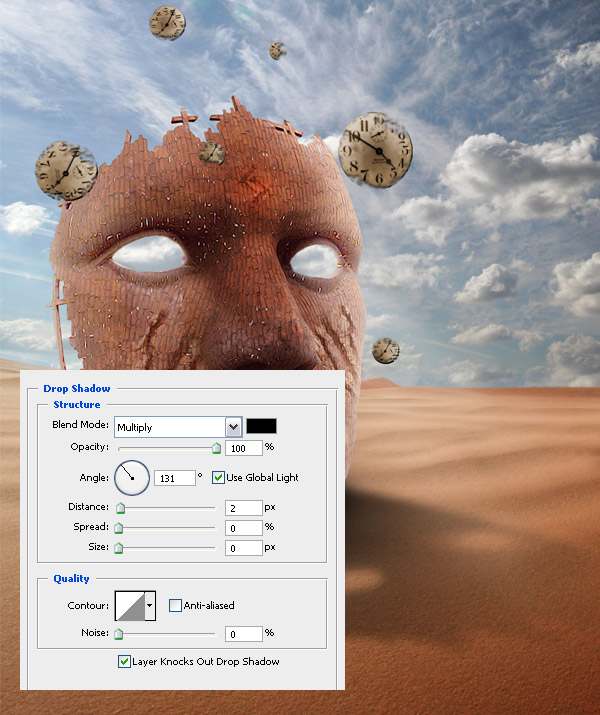
Double-click on the "clocks" layer to open the Layer Style window and use the settings from the following image for Drop Shadow.
Step 26
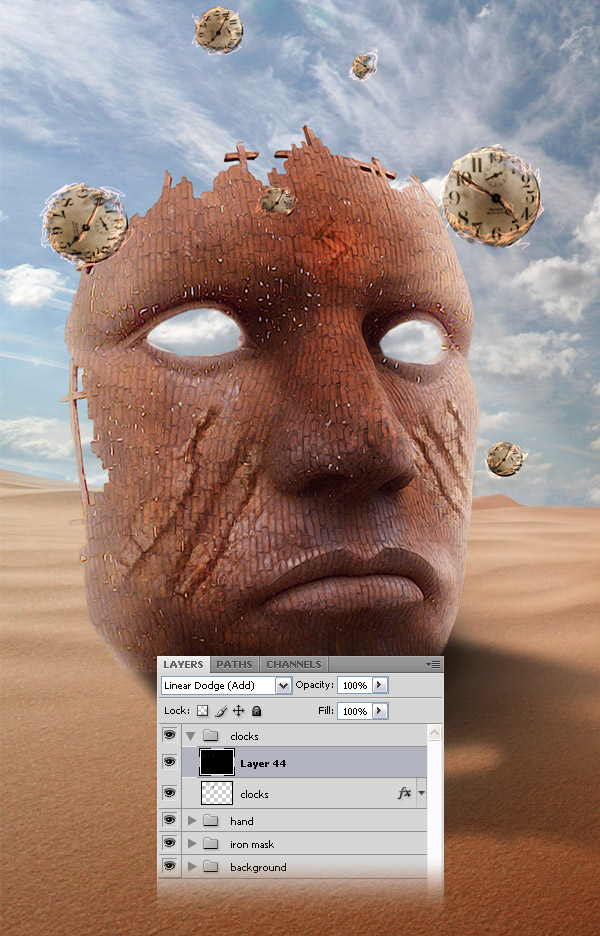
Create a new layer and fill it with black. Set the blend mode of this layer to Linear Dodge (Add). Then select the Brush Tool (B), select a brush with the diameter of 2-3px, select a nice orange color and create some random lines around your clocks. Take a look at the following image for reference.
Step 27: Add some birds
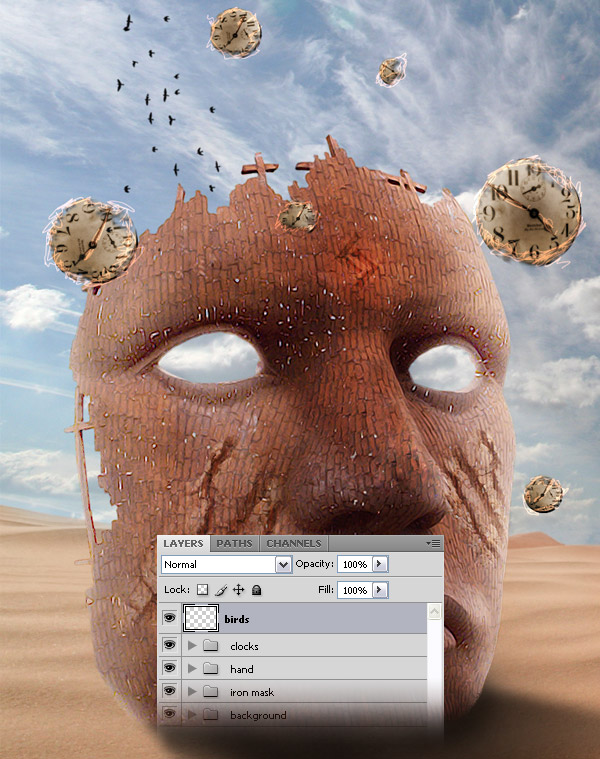
Download these brushes and install them. Then create a new layer and use those brushes to create some small birds on your sky. Name this layer "birds."
Step 28: Final color adjustments
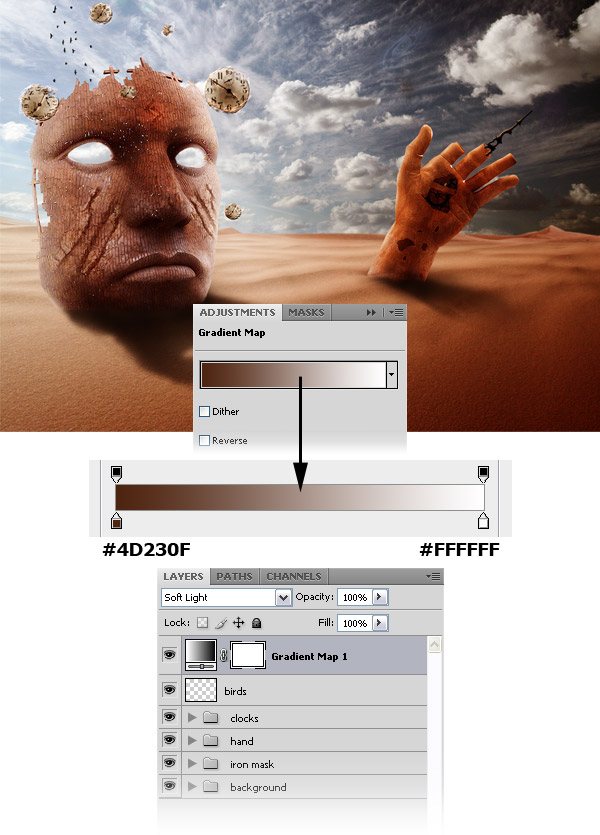
Go to Layer > New Adjustment Layer > Gradient Map and use the settings from the following image. Set the blend mode of this layer to Soft Light.
Step 29
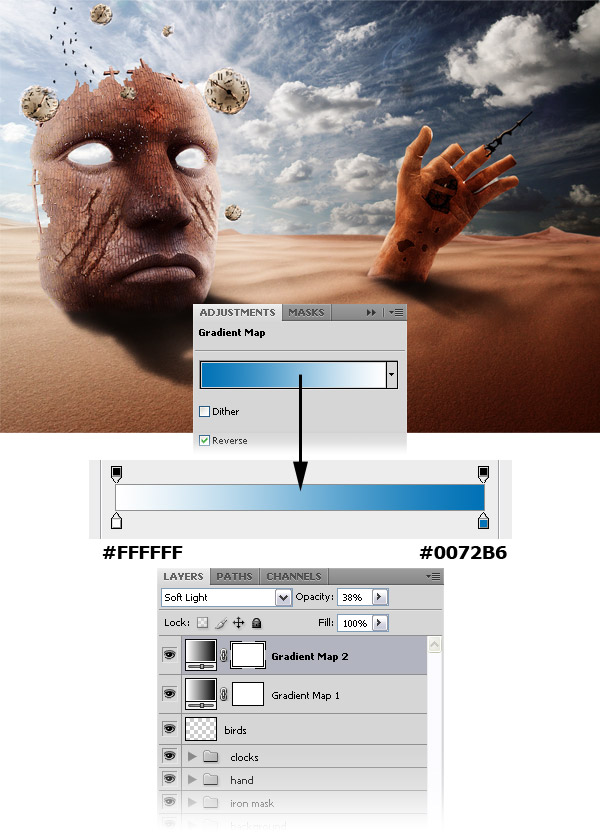
Go to Layer > New Adjustment Layer > Gradient Map and use the settings from the following image. Set the blend mode of this layer to Soft Light 38%.
Step 30
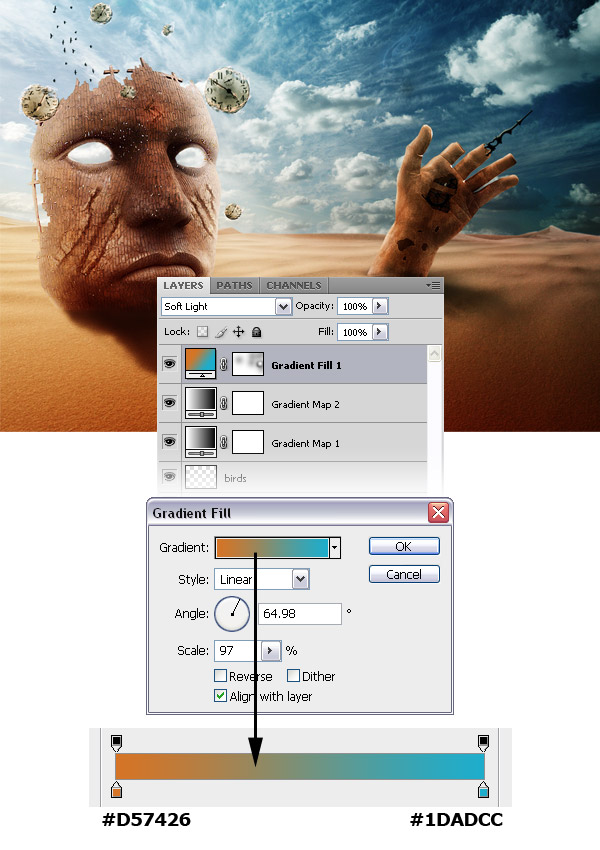
Go to Layer > New Fill Layer > Gradient Fill and use the settings from the following image. Set the blend mode of this layer to Soft Light.
Step 31
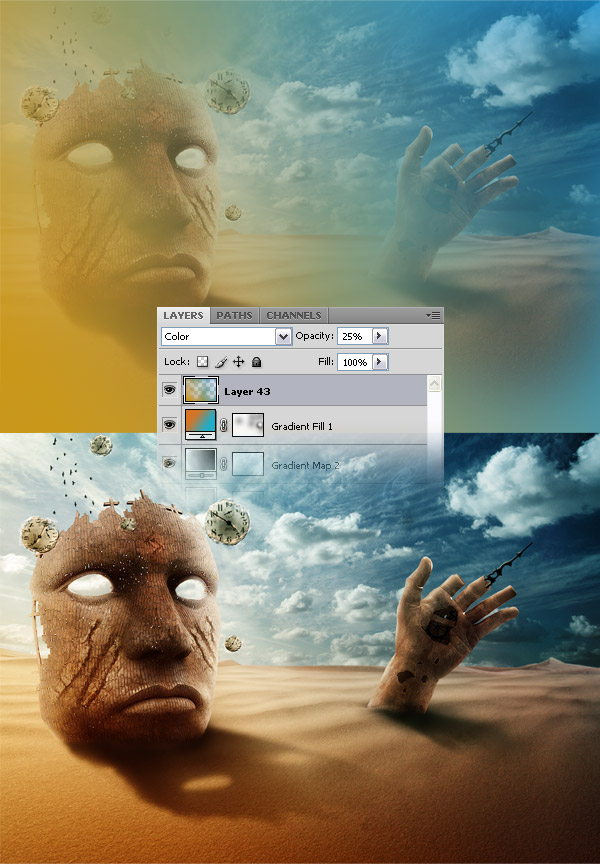
Create a new layer, select a big soft brush (B) and paint with yellow in the left side of your image and with blue in the right side. Then set the blend mode of this layer to Color 25%.
Final Result
I hope you enjoyed this tutorial and that you learned something new. What we have obtained is a photo-manipulation with some ruins in the desert; the clocks, the gears and the clock needle make everything to gravitate around the time theme.